
 11
11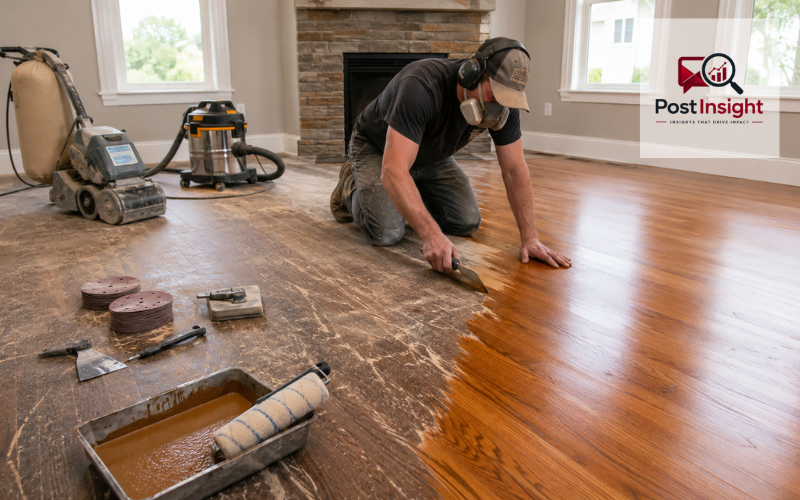
Learning how to refinish hardwood floors can help you bring a worn, scratched, or faded floor back to life without replacing it. Full refinishing means removing the old surface coating, sanding the wood smooth, repairing small defects, applying stain when desired, and sealing the floor with a fresh protective finish.
The process sounds simple, but it is a demanding home project. Floor sanders are heavy, wood dust spreads easily, and one mistake with a drum sander can leave a visible dip in the boards.
Not every tired floor needs full sanding. Light scratches and a dull surface may respond to cleaning, screening, buffing, and recoating. This guide explains both approaches so you can choose the least aggressive method that will provide a lasting result.
| Step | What to Do | Important Tip |
| Check the floor | Confirm the floor is solid hardwood or has a thick enough engineered-wood wear layer | Do not sand a thin veneer |
| Prepare the room | Remove furniture, seal vents and doors, and countersink raised nails | Dust control is essential |
| Sand the main area | Use coarse, medium, and fine sandpaper in sequence | Keep the sander moving |
| Sand edges and corners | Use an edge sander, scraper, or detail tool | Blend edges with the main floor |
| Repair damage | Fill small cracks, nail holes, and stable gaps | Replace rotten or loose boards |
| Fine-sand and clean | Buff the floor and vacuum every surface thoroughly | Dust can spoil the finish |
| Apply stain | Test the color, apply evenly, and remove excess stain | Staining is optional |
| Add the topcoat | Apply thin, even coats of a compatible floor finish | Follow exact recoat instructions |
| Allow curing | Keep furniture, rugs, pets, and heavy traffic away | Dry and fully cured are different stages |
First, identify the type of flooring. Solid hardwood is made from one piece of wood and can often be sanded more than once. Engineered hardwood has a real-wood top layer over a layered core.
Some engineered products can be refinished, while thin-veneer products may be damaged if a sander cuts through the top layer. The National Wood Flooring Association has a program identifying engineered products designed with enough wear layer for refinishing, showing why product specifications matter more than one thickness rule.
Look at a floor vent, doorway transition, or another exposed edge to estimate how much wood remains above the tongue-and-groove joint. Also check for nail heads close to the surface, very thin board edges, or signs of earlier heavy sanding. When the floor type or remaining thickness is uncertain, ask a flooring professional to inspect it before renting equipment.
Replacement or board repair may be safer when flooring is rotten, unstable, deeply cupped, repeatedly sanded, or badly thinned. Sanding cannot solve an active leak, failing subfloor, or serious movement.
The terms resurfacing and refinishing are often used loosely. Full refinishing normally removes the existing finish and a small amount of wood before new stain and topcoat are applied. It is appropriate for deep scratches, widespread discoloration, worn-through finish, or a floor that needs a major color change.
A lighter resurfacing or recoat treatment keeps the wood itself mostly untouched. The floor is cleaned, lightly abraded with a screen or buffer, and covered with a compatible new finish. Bona describes recoating as lightly scuffing the existing coating before adding another protective layer. This option can refresh a dull floor with surface wear, but it will not remove deep dents, dark stains, or badly uneven boards.
Choose the mildest process that solves the problem. Cleaning may be enough for dirt and haze. Buffing and recoating may suit a sound but dull finish. Full sanding is for damage that reaches through the coating or requires bare wood to be exposed.
A typical project uses a drum or belt sander for open areas, an edge sander near walls, and a scraper or detail sander for corners. A floor buffer or random-orbit machine may be used for final smoothing.
You will also need abrasives in several grits, a strong shop vacuum, plastic sheeting, painter’s tape, microfiber cloths, wood filler, applicators, stain when wanted, and a floor-rated protective finish.
A hardwood floor refinishing kit may include stain, sealer, applicators, or small abrasives, but large sanding machines are normally rented separately. Read the rental machine instructions and practice on scrap flooring or a hidden area before working in the center of the room.
Wear eye protection, hearing protection, gloves, knee pads, and a properly fitted particulate respirator during sanding. Wood dust is not simply a cleaning nuisance. OSHA identifies airborne wood dust from sanding as a health concern and recommends dust collection or local exhaust as the preferred control, with protective equipment as an additional measure.
Follow the finish manufacturer’s ventilation and fire-safety directions as well.
The cost to refinish hardwood floors depends on location, room size, floor condition, necessary repairs, stairs, stain choice, and finish type. Current U.S. estimates commonly place professional refinishing around $2 to $8 per square foot, with Angi reporting about $3 to $8 per square foot. Dust-controlled methods, difficult layouts, and extensive repairs can raise the price.
DIY work removes much of the labor cost, but the budget still needs to cover machine rental, sanding belts and discs, filler, stain, finish, brushes, pads, plastic protection, respirator filters, and disposal supplies.
To refinish hardwood floors cheaply without sacrificing the result, clear the rooms yourself, remove and label shoe molding carefully, compare rental packages, measure the floor accurately, and buy only compatible products.
Do not save money by skipping grits, using a household vacuum for heavy dust, or choosing an unsuitable finish. Include a reserve for torn sanding belts, extra coating, damaged trim, furniture storage, or temporary accommodation when odor and limited access make the home difficult to use.
Remove all furniture, rugs, curtains, wall art, and movable appliances. Seal doorways and openings with plastic, cover vents, and switch off the affected HVAC zone when it is safe to do so. Do not run a return vent that can pull sanding dust through the house.
Carefully remove shoe molding or baseboards when they prevent the sander from reaching the edge. Number each piece on the back so it can be returned to the correct position.
Countersink raised nails, tighten loose boards, remove staples, and scrape away adhesive. Any metal left above the wood can tear an abrasive or create sparks.
Plan the order of work before sanding. Know where the power cords will run, where filled dust bags will go, and how you will leave the room after applying the final coat. Good preparation keeps the project manageable.
Start in a hidden area and confirm that the machine, grit, and technique remove the finish without cutting too deeply.
With a drum sander, begin moving before lowering the drum and raise it before stopping. Home Depot’s current rental guidance gives the same basic instruction because pausing with the drum engaged can create a hollow or gouge.
For most straight-laid floors, make the finishing passes with the grain. A common sequence begins around 36 or 40 grit for old finish and deeper damage, moves to roughly 60 grit, and finishes around 80 or 100 grit.
The starting grit depends on the coating and floor condition. Do not jump from a very coarse abrasive directly to a fine one because it may not remove the earlier scratch pattern.
Overlap each pass slightly and keep a steady walking speed. Vacuum the floor and machine between grit changes so loose coarse particles do not scratch the newly smoothed surface. Change loaded or damaged abrasives instead of forcing them to keep cutting.
The large sander cannot reach the perimeter, so use an edge sander with the same general grit progression. Keep it moving in controlled, overlapping arcs. Pressing too hard or staying in one place creates circular marks and low spots that become obvious after stain is applied.
Use a sharp hand scraper, detail sander, or oscillating tool in corners, under cabinet edges, around radiator pipes, and beside door frames. Blend these areas into the main field rather than treating them as separate strips.
A final buffer pass can help soften the difference between drum-sanded and edge-sanded sections. Professional abrasive guidance describes buffing as the stage that removes remaining machine imperfections and prepares the surface for coating.
Before moving on, shine a strong work light across the floor at a low angle. Side lighting reveals swirls, ridges, leftover finish, and scratches that normal overhead lighting may hide.
After the old finish is removed, fill nail holes, small cracks, and stable defects with a wood filler that accepts the chosen stain or finish. On some floors, a contractor may spread trowel filler across a broad area to close many small openings.
Allow the filler to dry fully, and then sand it level. Do not automatically fill every gap. Wood naturally expands and contracts as indoor moisture changes, and filler placed in active seasonal gaps may crack or push out. Moving gaps need diagnosis rather than cosmetic filling.
Replace boards that are rotten, badly split, loose, or too thin to remain safe. Dark pet or water stains may improve with sanding, but stains that have penetrated deeply can remain visible.
Fix the moisture source before covering any water-related damage. Refinishing over damp or unstable flooring may hide the problem temporarily, but it will not prevent the damage from returning.
Fine sanding should remove filler residue and blend the floor without creating shiny low areas. Follow with a screen or buffer only when it suits the wood, abrasive sequence, and finish system. Move evenly and avoid lingering at edges.
Inspect the entire room again for machine marks and leftover coating. Then vacuum the floor slowly, followed by walls, windowsills, trim, radiators, door frames, and any ledges that could drop dust into the wet finish.
Empty sanding dust safely and according to the machine and finish instructions. Fine wood dust should not be allowed to collect near heat, sparks, flames, or finishing products.
Complete the cleaning with a fresh microfiber cloth or the wiping method recommended by the coating manufacturer. Avoid introducing oily cleaners, wax, or excessive water.
Once the surface is clean, keep pets, outdoor shoes, fans, and unnecessary traffic out of the room.
You may be able to restore hardwood floors without sanding when the damage is limited to light scuffs, minor scratches, or a dull but well-bonded finish. Begin with a thorough cleaning using a product approved for finished wood.
For screening and recoating, a buffer lightly abrades the existing finish so the new coat can bond. This does not expose bare wood, so it is less dusty and removes less material than full refinishing.
Touch-up products may hide isolated scratches, but test them first because differences in color and shine can stand out.
Do not recoat over wax, polish residue, oil, silicone contamination, or a peeling finish without proper testing and preparation. A compatibility problem can cause the new coating to separate or form small round gaps known as fisheyes.
Deep scratches, widespread worn-through areas, dark stains, severe cupping, and loose boards usually need more than a no-sand refresh. In those situations, full sanding or board repair may be necessary.
Bare wood can be sealed in its natural color or stained darker, warmer, cooler, or more even. Natural finishing keeps a room brighter and avoids uneven stain.
Stain can create a major visual change, but sanding marks, filler, and differences between boards may become more noticeable. Test the full system—not only the stain—on spare boards or an inconspicuous area.
Wood species absorb color differently, and old stain may remain in seams or grain. Some woods benefit from a compatible conditioner, but use it only when the stain manufacturer recommends it.
Apply stain in manageable sections, follow the grain, and wipe away excess within the stated working time. Keep a wet edge so sections do not dry into visible lines.
Let the stain dry for the full period stated on the label, especially in cool or humid conditions. Confirm that the stain, sealer, and topcoat are designed to work together before coating the entire room.
Water-based polyurethane is popular for its lower odor, clear appearance, and faster turnaround. Bona states that many of its waterborne finishes dry in about two to three hours, although exact recoat and cure times depend on the product.
Oil-based polyurethane usually adds a warmer amber tone and may take longer to dry and fully cure. Always treat the product label as the controlling instruction rather than relying on a general timetable.
Use a suitable brush to cut in along the walls, and then apply the main coat with the recommended T-bar, roller, or lambswool pad. Work toward your planned exit and maintain a wet edge. Thin, even coats normally level and dry better than one heavy coat.
Some systems require abrasion between coats, while others allow recoating within a set window. For example, one Minwax floor product says sanding may not be needed within its stated recoat window but recommends light 220-grit sanding after a longer delay. Follow the instructions for the exact product in your room.
“Dry to touch,” “ready to recoat,” “light foot traffic,” and “fully cured” are different stages. A finish may feel dry while still being easy to damage.
Bona’s homeowner guidance allows stocking-foot traffic and furniture sooner than rugs, with rugs delayed until the referenced finish has fully cured. Other products vary, so follow the manufacturer’s times before replacing trim, carrying furniture, or laying rugs.
Lift furniture rather than dragging it, and use clean protective pads beneath the legs. Avoid placing plastic covers, rubber-backed mats, or heavy rugs on a coating that has not fully cured.
The most damaging mistake is sanding a floor that does not have enough usable wood above the joints. Other common problems include lowering the drum while stationary, skipping grits, using worn abrasives, sanding edges more deeply than the center, and failing to remove all dust before coating.
Heavy stain or finish can dry unevenly, wrinkle, trap marks, or leave overlap lines. Poor ventilation, unsuitable temperature, and high humidity may extend drying time.
Mixing products from different systems without checking compatibility can also lead to poor bonding or unwanted color changes. Use stains, sealers, and topcoats that the manufacturers confirm can be used together.
Do not walk on the surface simply because it feels dry, and never drag furniture back into place.
Use help when carrying heavy machines, and stop the project when you find structural movement, active moisture, severe cupping, or widespread board failure. Those conditions require repair, not simply a better sanding technique.
Knowing how to refinish hardwood floors begins with choosing the right level of treatment. Confirm that the floor can safely be sanded, prepare the room carefully, progress through the sanding grits without rushing, repair only suitable defects, and remove every trace of dust before staining or sealing.
The best result comes from patience. Keep the sander moving, blend the edges with the center, apply thin finish coats, and respect both drying and curing times.
When the coating is merely dull, buffing and recoating may restore it without full sanding. When the floor is thin, severely damaged, historically valuable, or difficult to identify, professional assessment is safer than risking permanent damage.
Most DIY projects take three to seven days, including preparation, sanding, coating, and drying. Full curing may take longer, depending on the finish, ventilation, temperature, and humidity.
Not always. Floors with a sound finish and only light scratches may be cleaned, screened, buffed, and recoated. Deep scratches, bare patches, stains, or uneven boards usually need sanding.
Solid hardwood can often be refinished several times. Engineered hardwood may be refinished only when its real-wood wear layer is thick enough, so check the product details or seek professional advice.
Professional cost depends on room size, floor condition, repairs, location, stain choice, and finish type. DIY work can cost less but still requires equipment rental, abrasives, safety gear, and coating materials.
Water-based polyurethane dries faster, has less odor, and stays clearer. Oil-based polyurethane dries more slowly but usually adds a warmer amber tone. The best choice depends on appearance and project timing.
Disclaimer: This article provides general home-improvement information and is not a substitute for an in-person flooring inspection. Floor construction, previous sanding, moisture damage, coatings, and product requirements can vary. Always follow equipment and finish manufacturers’ safety instructions. Consult a qualified flooring professional before sanding thin engineered wood, severely damaged floors, or historically valuable flooring.