
 11
11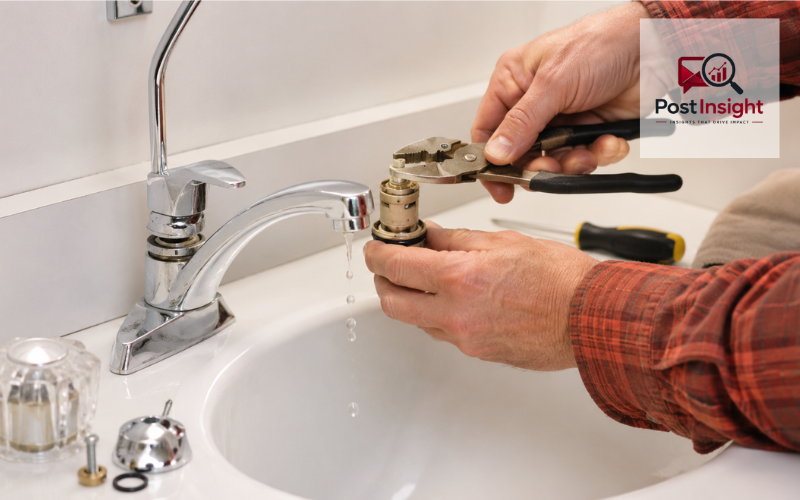
A dripping faucet may seem like a small problem, but the constant sound of water drops can quickly become annoying. It can also waste water and may point to worn parts inside the faucet. The good news is that many faucet leaks can be fixed at home with basic tools and a little patience.
If you want to learn how to fix dripping faucet problems, the first thing to understand is why the leak is happening. Most faucets drip because a small internal part has worn out. This may be a washer, O-ring, cartridge, seal, or valve part. In some cases, mineral buildup from hard water can stop the faucet from closing fully, which allows water to keep passing through.
The repair depends on the type of faucet you have. A single-handle faucet usually works differently from a two-handle faucet. A bathroom faucet may have smaller parts than a kitchen faucet, and a modern cartridge faucet may need a different repair than an older compression faucet.
This guide will walk you through the process in a simple way. You will learn how to prepare, shut off the water, take the faucet apart carefully, match the correct replacement part, and test the faucet after reassembly.
| Faucet Problem | Likely Cause | Quick Fix |
| Drip from the spout | Worn washer or faulty cartridge | Replace washer, stem, or cartridge |
| Leak around the handle | Damaged O-ring or loose packing nut | Tighten nut or replace O-ring |
| Single-handle faucet leaks | Bad cartridge or internal seal | Remove handle and replace cartridge |
| Two-handle faucet leaks | Worn washer, O-ring, or stem | Repair the leaking hot or cold side |
| Leak continues after repair | Wrong part, damaged valve seat, or corrosion | Recheck part match or call a plumber |
A faucet usually drips because something inside is no longer sealing properly. When the handle is turned off, the internal parts should block the water completely. If one of those parts is worn, loose, cracked, or dirty, water can still escape through the spout or around the handle.
One of the most common causes is a worn-out washer. Washers are small rubber parts that press against the valve seat to stop water flow. Over time, the rubber can become flat, cracked, or stiff. When that happens, the faucet may drip even when the handle is fully closed.
A damaged O-ring can also cause leaking, especially around the handle or base of the faucet. O-rings are small rubber rings that help seal moving parts. If they wear out, water can seep through tiny gaps.
Modern faucets often use cartridges instead of simple washers. A faulty cartridge can cause dripping from the spout or leaking near the handle. In some faucets, the problem may also be a loose packing nut, bonnet nut, mineral buildup inside the faucet, or a damaged valve seat.
Before taking anything apart, gather the tools and parts you may need. Having everything ready will make the job easier and help you avoid losing small pieces during the repair.
For most dripping faucet repairs, you may need an adjustable wrench, Phillips screwdriver, Allen wrench, utility knife, and pliers. You may also need plumbing grease, also called plumber’s grease, to lubricate rubber parts before reinstalling them. Depending on the faucet, the replacement part may be a washer, O-ring, stem, cartridge, or complete repair kit.
It is also helpful to place a towel or washcloth over the sink drain. Faucet screws and small clips can fall easily, and the towel will stop them from disappearing down the drain. Keep another towel nearby to wipe up water.
Try to work slowly and keep the parts in the order you remove them. You can also take a quick photo with your phone before each step. This makes it easier to remember how everything fits when it is time to reassemble the faucet.
Never start a faucet repair without turning off the water first. Look under the sink for the hot and cold shut-off valves. These are usually small oval or round handles connected to the water lines. Turn each valve clockwise until it stops.
After the valves are closed, turn on the faucet to release leftover water pressure from the lines. Let the water drain out for a few seconds. This helps prevent water from spraying when you remove internal parts.
Once the water is off, clear the sink area. Move soap bottles, toothbrush holders, cleaning supplies, or anything else that may get in the way. Cover the drain with a towel or washcloth before removing the handle screw or any small parts.
If your shut-off valves are stuck or do not stop the water fully, do not force the faucet apart. In that case, you may need to shut off the main water supply or call a plumber.
Knowing the faucet type is one of the most important parts of learning how to fix dripping faucet leaks correctly. Different faucets have different internal parts, and using the wrong method can damage the faucet.
A single-handle faucet controls both hot and cold water with one handle. These faucets often use a cartridge, ball, or ceramic disc system. If a single-handle faucet is dripping from the spout, the cartridge or seals may need to be replaced.
A two-handle faucet has separate handles for hot and cold water. These may use compression stems, cartridges, or ceramic valves. If only hot or cold water is dripping, the problem is usually on that side.
A compression faucet is more common in older fixtures. It usually has handles that turn several times to open and close. These faucets often drip because of a worn washer at the bottom of the stem.
A cartridge faucet may have one or two handles, but the repair usually involves removing and replacing the cartridge. Kitchen faucets may also have pull-down sprayers or swivel spouts, while bathroom faucets are often simpler and smaller.
If you are searching for how to fix leaky faucet single handle problems, start by finding the handle screw. On many single-handle faucets, the screw is hidden under a small decorative cap or located on the side of the handle as an Allen screw.
Use the correct screwdriver or Allen wrench to loosen the screw. Lift the handle straight up or pull it off gently. Avoid forcing it, because some handles may stick due to mineral buildup.
Once the handle is removed, you may see a retaining nut, clip, or ring holding the cartridge in place. Remove this carefully and remember its position. Then use pliers to pull the cartridge straight out. Try not to twist it too hard unless the faucet design allows it.
Take the old cartridge to a hardware store or compare it with the manufacturer’s part number if you can find one. The replacement must match correctly. Install the new cartridge in the same direction as the old one, making sure any tabs or notches line up. Reassemble the handle, turn the water back on slowly, and test for leaks.
A single-handle bathroom faucet often has smaller parts than a kitchen faucet, but the repair idea is similar. If you need to know how to fix leaky faucet single handle bathroom fixtures, begin by checking the handle for a small cap, button, or hidden screw.
Pry off the decorative cap gently if there is one. Remove the screw and lift the handle away. Under the handle, you may find a cartridge, O-ring, seal, or retaining nut. Inspect these parts closely. If the rubber looks cracked, flattened, or stiff, it should be replaced.
Mineral buildup is also common in bathroom faucets, especially in areas with hard water. If you see white or chalky buildup inside the faucet body, clean it carefully with a soft cloth. Avoid scratching the inside surface.
Replace damaged parts with exact-size replacements. Even a slightly different O-ring or cartridge may not seal properly. After replacing the part, reinstall the handle and test both hot and cold water.
If you want to know how to fix a leaky faucet with two handles, the first step is to find out which side is leaking. Turn off the cold water valve under the sink and check whether the dripping stops. If it does, the cold side is likely the problem. If not, turn the cold side back on and test the hot side.
Once you know which side is leaking, remove that handle. Many two-handle faucets have a decorative cap on top of the handle. Under the cap, there is usually a screw. Remove the screw and lift off the handle.
Next, remove the packing nut or retaining nut and take out the stem assembly. Look at the washer at the bottom of the stem and inspect the O-ring around the stem. If either part is damaged, replace it with the same size.
In older compression faucets, the washer is often the main reason for dripping. In cartridge-style two-handle faucets, you may need to replace the small cartridge instead. Reassemble the faucet and test it before replacing parts on the other side.
Learning how to fix a leaky bathroom faucet with two handles is useful because these faucets are common in sinks and vanity areas. Start by turning off both water supply valves under the sink. Then open the faucet to release pressure.
Remove the decorative caps from the handles if they have them. Unscrew the handle and lift it away. If the handle is stuck, wiggle it gently instead of pulling too hard.
Once the handle is off, remove the nut holding the stem in place. Pull the stem out and check the washer at the bottom. If it is worn or cracked, replace it. Also check the O-ring around the stem. Apply a small amount of plumbing grease to the new O-ring before installing it.
When putting the faucet back together, tighten the parts firmly but do not over-tighten them. Too much force can damage threads, crack parts, or make the handle hard to turn. After reassembly, test the hot and cold handles separately.
A kitchen faucet may leak from the spout, handle, base, or sprayer connection. To understand how to fix leaky kitchen faucet problems, first look closely at where the water is coming from.
If water drips from the spout when the faucet is off, the cartridge, washer, or valve parts may be worn. If water leaks around the handle, the O-ring or packing area may be the issue. If water gathers around the base, check the seals near the swivel spout or faucet body.
Kitchen faucets with pull-down or pull-out sprayers may also have hose or connection leaks. Look under the sink while the faucet is running to see if water is dripping from the hose, weight area, or supply line connections.
For cartridge kitchen faucets, remove the handle, take out the cartridge, and replace it with an exact match. For faucets with swivel spouts, inspect and replace worn spout O-rings if needed. Clean any buildup before reassembling the faucet.
Sometimes the leak is not from the spout but from around the handle. If you are trying to figure out how to fix dripping faucet handle leaks, begin by checking whether the packing nut or bonnet nut is loose.
Turn off the water first. Remove the handle if needed, then gently tighten the packing nut with a wrench. Do not tighten it too much. A small adjustment may be enough to stop water from leaking around the handle.
If tightening does not solve the problem, the O-ring or seal under the handle may be worn. Remove the stem or cartridge and inspect the rubber parts. Replace any cracked, flat, or loose seals.
Also check for cracks in the handle area or worn internal parts. If the faucet is old and the metal is badly corroded, replacing one small part may not be enough. Never force the handle back into place. If it does not fit smoothly, remove it and check the alignment.
Some people search for how to fix a leaky faucet without tools because they want a quick solution. In a few cases, you may be able to try simple checks before using tools.
For example, make sure the handle is fully closed. If the leak is around the base or handle, check whether any visible part feels loose and can be gently tightened by hand. You can also wipe away visible mineral buildup around the spout or handle area.
However, most real faucet leaks need at least a screwdriver or wrench. Internal parts like washers, O-rings, stems, and cartridges are usually hidden under the handle. If one of those parts is worn, it must be removed and replaced.
No-tool fixes may help with very minor surface issues, but they will not repair a damaged washer or faulty cartridge. If the faucet keeps dripping, it is better to use the proper tools and fix the actual cause.
After replacing the worn part, put the faucet back together in the same order you took it apart. This is why it helps to keep parts arranged neatly or take photos during disassembly.
If you replaced a cartridge, make sure the tabs, notches, or flat sides line up correctly with the faucet body. A cartridge installed in the wrong direction may cause poor water flow, reversed hot and cold water, or continued leaking.
Start by hand-tightening the nut or retaining part. Then use a wrench to snug it slightly if needed. Avoid over-tightening because this can damage the faucet or make future repairs harder.
Reattach the handle and screw. Turn the water supply valves back on slowly. Watch the faucet carefully as water pressure returns. Check the spout, handle, base, and under-sink area. Run both hot and cold water, then turn the faucet off and see whether the drip has stopped.
A written guide is helpful, but sometimes a video makes the repair easier to understand. Searching for how to fix a dripping faucet video can be useful if you want to see how a handle comes off, how a cartridge is pulled out, or how a two-handle stem is removed.
A video can also help you find hidden screws, clips, or retaining nuts that are not obvious at first. This is especially helpful if your faucet has a decorative handle or a design you have not seen before.
The important thing is to watch a video that matches your faucet type. A single-handle cartridge faucet is not repaired the same way as an older two-handle compression faucet. Following the wrong video can lead to confusion or damage.
Also avoid advice that skips basic safety steps. A good repair process should always include turning off the water, protecting the drain, removing parts carefully, and testing slowly after reassembly.
Many dripping faucet repairs are simple, but some situations are better handled by a plumber. If the shut-off valves under the sink do not work, do not continue taking the faucet apart while water is still active.
You should also call a plumber if the faucet parts are badly corroded, stuck, or breaking apart as you remove them. Forcing old parts can damage the faucet or create a bigger leak.
If the faucet still leaks after you replace the washer, O-ring, stem, or cartridge, there may be damage deeper inside the fixture. A damaged valve seat, cracked faucet body, or hidden plumbing issue may need professional repair.
Water leaking under the sink is another warning sign. That may involve supply lines, sprayer hoses, drain parts, or connections that are separate from the faucet cartridge or washer. If you cannot identify the correct replacement part, getting help can save time and prevent mistakes.
Knowing how to fix dripping faucet problems starts with finding the real cause of the leak. A dripping faucet is usually not fixed by guessing or simply tightening the handle harder. The better approach is to identify the faucet type, shut off the water, remove the parts carefully, and replace the worn washer, O-ring, stem, seal, or cartridge.
Single-handle faucets often need cartridge or seal replacement. Two-handle faucets may need a washer, O-ring, stem, or small cartridge. Kitchen faucets may have extra parts such as swivel spout seals or sprayer connections, while bathroom faucets are often more compact but still need the correct replacement parts.
After the repair, always turn the water back on slowly and check the spout, handle, base, and under-sink area. A careful test helps confirm that the leak is fixed and that all parts are seated properly.
A dripping faucet can feel frustrating, but with the right steps, many common leaks can be repaired safely and simply. The key is to work slowly, match the right part, and avoid forcing anything that does not move easily.
A faucet usually keeps dripping because the washer, O-ring, cartridge, or valve seat is worn or dirty. These parts stop water flow, so even small damage can cause a leak.
Yes, many dripping faucets can be fixed at home with basic tools. The key is turning off the water first, identifying the faucet type, and replacing the correct worn part.
Remove the handle, take out the retaining clip or nut, pull out the cartridge, and replace it with an exact match. Reassemble everything and test the faucet slowly.
In many two-handle faucets, the washer, O-ring, or stem is the problem. If only hot or cold water drips, repair that specific side first.
Call a plumber if the shut-off valves do not work, parts are stuck or corroded, the faucet body is cracked, or the leak continues after replacing the correct part.
Disclaimer: This article is for general home improvement guidance only. Faucet designs can vary by brand and model. Always turn off the water before repairs, follow manufacturer instructions when available, and contact a licensed plumber if you are unsure or the leak continues.