
 11
11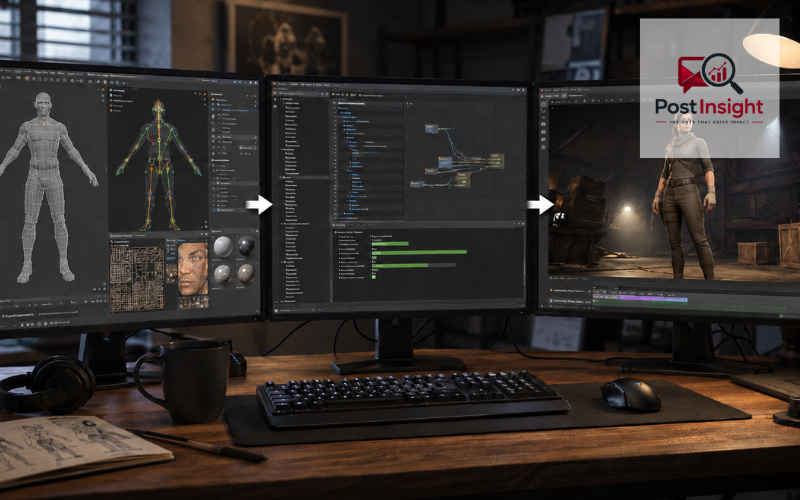
SFM compile is the process of turning a 3D model and its supporting files into a format that Source Filmmaker can use. A character, prop, weapon, or other object created in Blender, Maya, or similar software cannot normally be used in SFM just by saving the original project file and placing it in a folder.
Instead, the model must pass through the Source model pipeline. The basic workflow is: prepare the source model, export it to a compatible intermediate format, create a QC instruction file, run the files through a compiler, and then test the finished model inside Source Filmmaker.
Valve’s Source pipeline commonly uses intermediate files such as SMD or DMX. A program called StudioMDL reads these files together with the QC instructions and creates the compiled model. Tools such as Crowbar can make the compiling process easier by providing a graphical interface instead of requiring users to work entirely from the command line.
Textures, materials, bones, animations, attachments, and other model features may also be part of the workflow. Compiling is therefore more than importing a model. It is the step that prepares the asset according to the rules expected by the Source engine.
| Component | Purpose |
| Blender/Maya | Creates and prepares the 3D model |
| SMD/DMX | Exports model data for the Source pipeline |
| QC File | Gives compilation instructions to StudioMDL |
| StudioMDL | Compiles source files into the final Source model |
| Crowbar | Provides an easier interface for compiling models |
| MDL + Companion Files | Final files used by Source Filmmaker |
| VMT/VTF | Controls model materials and textures |
When an SFM model is compiled, StudioMDL reads the instructions in the QC file and processes the model’s source data. It converts exported information into the binary files used by Source.
The .mdl file is usually treated as the main model file, but a Source studio model often relies on several companion files. Depending on the model, these can include files containing mesh, vertex, animation, or physics data. The MDL effectively works with this related information rather than always holding every part of the asset by itself.
During compilation, information about the mesh, skeleton, materials, animations, and other settings is brought together according to the QC instructions.
A successful compile message is important, but it does not prove that everything is visually correct. A model may compile without a fatal error and still appear with the wrong scale, broken materials, poor bone movement, or an incorrect position in SFM. For this reason, compiling and testing should be treated as two separate stages.
A basic SFM compile workflow starts with a 3D modeling application. Blender is a common choice, while Maya and other professional modeling tools may also be used if they can produce suitable Source pipeline data.
For Blender users, Valve’s documentation describes Blender Source Tools as supporting the import and export of SMD and DMX files. These intermediate formats allow information from the editable 3D project to move into the Source model pipeline.
You will also need a QC file. It is a plain-text script, so a normal text editor can be used to create or edit it.
The main compiler is StudioMDL, a command-line program that converts intermediate model formats into Source model files. Crowbar is another useful tool. It supports Source and GoldSource model-related tasks and provides an interface for functions such as compiling and decompiling.
The exact files needed depend on whether you are making a simple static prop, a rigged character, or a model with animations and other advanced features.
Good preparation can prevent many SFM compile problems before they happen. Start by checking the model’s scale, position, orientation, and transforms in your 3D application. An incorrectly prepared model may later appear extremely small, very large, rotated, or far from the expected location.
The mesh should also be clean. Remove geometry that is not needed and check for obvious modeling problems. Organize model parts with clear names, especially when the asset contains several separate objects.
UV mapping should be completed before preparing final Source materials. UV coordinates tell the model how a texture is placed across its surface, so poor UVs can make an otherwise correct texture appear stretched or misplaced.
Character models need additional attention. Check the skeleton, bone hierarchy, vertex weights, and pose before export. Vertex weights control how strongly different bones affect parts of the mesh. Problems at this stage can cause arms, clothing, faces, or other areas to bend incorrectly later.
Taking time to clean the original model is usually more effective than trying to correct every problem after compilation.
Your Blender or Maya project is the editable source, not the final SFM model. Before compilation, the necessary model information must be exported into a format understood by the Source toolchain.
SMD and DMX are commonly used in this workflow. Valve’s documentation identifies them among the formats handled by Source model tools, and Blender Source Tools supports both formats.
Depending on the asset, you may need separate exported data for the main mesh, reference pose, animations, or other components. A simple prop will usually require much less than a fully rigged character with multiple animation sequences.
Organization matters here. Keep exported files in predictable folders and use clear file names. Your QC script needs to find these files, so changing a folder or file name without updating the QC can cause a compile failure.
For animated models, confirm that the bone names, hierarchy, and exported animation match the intended skeleton. It is easier to fix an export problem at its source than to repeatedly change compiler settings without knowing what went wrong.
The QC file is one of the most important parts of SFM compile. Valve describes QC as a script that controls how source model files are compiled into a binary model.
In simple terms, the QC file is a set of instructions for StudioMDL. It can tell the compiler what the finished model should be called, which exported mesh to use, where the model should look for materials, and which animation sequences should be included.
More advanced QC files can also contain instructions involving attachments, physics, bones, body groups, collision models, flexes, skins, and other features. Not every model needs all of these.
The output path is especially important because it determines where the compiled model belongs within the Source model directory structure. Material paths also need to match the actual material folders used by the finished asset.
A clear QC file makes troubleshooting much easier. When possible, start with the minimum instructions needed for your model and add advanced features only when they are actually required.
Several QC commands appear frequently in Source model projects. $modelname defines the path and file name used for the compiled model. $body can identify model geometry, while $model is used in workflows that need additional model features. $cdmaterials tells the model where its Source material files should be found. $sequence defines an animation sequence and is also commonly involved in basic model setup. Valve’s QC and model documentation provides detailed rules for these commands.
A simplified QC might contain instructions similar to:
$modelname “yourfolder/yourmodel.mdl”
$body “body” “yourmodel.smd”
$cdmaterials “models/yourfolder/”
$sequence “idle” “yourmodel.smd”
This is only a basic illustration. A character, physics prop, facial model, or asset with several animations may need additional commands.
Avoid filling a QC file with commands copied from an unrelated model simply because they look advanced. Extra instructions can make troubleshooting harder. A smaller QC file that accurately describes the asset is generally easier to understand and maintain.
Model compilation and texture preparation are related, but they are not the same process. Source uses VMT material files, which describe how a material behaves, while texture image data is commonly stored in VTF files. Valve’s model-material documentation explains that a VMT can define elements such as the lighting model and base texture.
The QC file does not simply pack your original PNG, JPG, or Blender material directly into the model. Instead, $cdmaterials helps define the material search path used by the model.
The material names assigned to the exported mesh must therefore match the intended Source material setup. If names or paths do not agree, SFM may fail to display the surface correctly.
A familiar sign of a material problem in Source is a missing or incorrect texture appearance. When this happens, check the material name on the model, the $cdmaterials path, the VMT location, and the texture path referenced by the VMT. Valve’s modeling troubleshooting documentation specifically recommends checking both model material paths and texture references when materials fail to load.
Character models are more demanding than static props because the mesh needs to move with a skeleton. A skeleton is made from bones arranged in a hierarchy, and different parts of the mesh are weighted to those bones.
Before compiling, make sure bone names stay consistent throughout the project. Changing names between the reference mesh and animation files can cause unexpected results. The parent-and-child relationships between bones also matter because they determine how movement travels through the skeleton.
Vertex weights should be tested carefully. Poor weighting can make elbows collapse, shoulders stretch, or clothing move in unnatural ways.
The root of the skeleton and its orientation should also be checked before export. If the base setup is incorrect, the model can appear rotated, offset, or difficult to animate inside Source Filmmaker.
Do not add large numbers of unnecessary bones without a reason. A simpler, well-organized rig is easier to troubleshoot. Character compilation may also involve features such as animation sequences, attachments, facial controls, or physics, making careful preparation especially important.
StudioMDL is the program that performs the Source model compile. It can be run from the command line with a QC file and appropriate game or project settings. Valve describes it as the tool used to turn intermediate model formats into the binary model format read by Source.
Crowbar makes this process more approachable for users who prefer a graphical interface. Its project describes it as a GoldSource and Source Engine modding tool, and its feature set includes model compiling as well as decompiling.
When using Crowbar, select the correct game or SFM configuration, point the tool to the QC file, and start the compile. The configuration matters because StudioMDL needs the correct engine tools and game paths.
After starting the process, read the compiler log. Do not focus only on whether the final line says the compile completed. Errors and warnings earlier in the log may reveal missing files, bone problems, incorrect paths, or other issues.
Finally, check that the expected model files were created in the intended output location.
The .mdl file is the file people usually identify as the Source model, but it may be only one part of the complete compiled asset.
Valve’s documentation explains that Source models can store additional data in files such as VVD, VTX, PHY, and ANI, depending on the model. The VVD can contain vertex-related data, while VTX files contain information used for rendering the mesh. Physics or animation information can also be placed in separate companion files when required.
This is why copying only the .mdl file from one location to another can result in an incomplete model.
The compiled model files need to remain in the correct model directory structure, while VMT and VTF material files belong under the appropriate materials structure. SFM also needs to have that content location enabled through its game/mod search paths.
Keeping the folder layout clean is especially useful when you later update the model. You can quickly identify which files are source exports, which are compiled output, and which belong to the material system.
Many SFM compile problems come from simple file or path mistakes. If StudioMDL reports that an SMD or DMX file cannot be found, first check the file name, extension, location, and the path written in the QC.
Material problems require a different approach. A model can compile successfully while still having missing materials because the compiler and the material system handle different parts of the asset. Verify the material name, $cdmaterials path, VMT file, and VTF reference.
Characters may produce issues involving bone names, bone hierarchy, vertex weights, or animation data. If the model becomes badly stretched after loading, inspect the rig and weights in the original 3D project instead of assuming the compiler caused the problem.
Scale and orientation errors also often begin before compilation. An oversized, tiny, rotated, or misplaced model may need changes to its source transforms or export settings.
Most importantly, read the complete StudioMDL or Crowbar log. Separate fatal errors that stop compilation from warnings that allow the model to compile but deserve further testing.
After a successful SFM compile, load the model in Source Filmmaker and inspect it carefully. Start with basic visual checks: overall size, orientation, position, materials, texture mapping, and surface appearance.
If the model is rigged, pose several important bones rather than checking only the default position. Bend the arms and legs, rotate the head, and test areas where several bones influence the same part of the mesh. This can reveal weighting problems that are invisible in a neutral pose.
Models with animation sequences should have those sequences tested as well. If the project contains attachments, flexes, or physics-related features, test each feature separately.
When you find a problem, change the part of the workflow that actually controls it. For example, fix weights in the 3D file, correct a bad path in the QC, or repair a material reference in the VMT. Recompiling the same unchanged files will usually reproduce the same result.
Keeping separate, clearly named source, export, material, and compiled folders makes this testing cycle much easier to manage.
A reliable SFM compile workflow is built around a clear sequence: prepare the model, export the correct Source-compatible data, create an accurate QC file, compile it with StudioMDL, and test the finished asset in Source Filmmaker.
StudioMDL is the actual Source model compiler. Crowbar is a useful interface and model-modding tool that can make working with the compiler easier. Understanding that difference helps make the process less confusing.
Correct exports and organized paths are just as important as the compile itself. Materials must point to the right files, character bones and weights need to be prepared correctly, and all required companion files should remain with the compiled model.
When something goes wrong, work through the pipeline in order rather than changing several things at once. Check the source model, exported files, QC instructions, compiler log, output files, and final SFM test. This systematic approach makes errors easier to identify and gives you a much better chance of producing a stable, usable Source Filmmaker asset.
SFM compile prepares custom 3D models for Source Filmmaker. It converts exported model data and QC instructions into Source-compatible files that SFM can load and use.
No. StudioMDL performs the actual compilation. Crowbar is optional, but its graphical interface can make selecting QC files, configurations, and reading compiler output easier.
A QC file is a text-based instruction script that tells StudioMDL which model files to compile, where materials are located, and which animations or other features to include.
Successful compilation does not guarantee correct materials. Check the $cdmaterials path, VMT files, VTF texture references, and whether the mesh uses the correct material names.
The main output is usually an .mdl file, but Source models may also require companion files such as VVD, VTX, PHY, or ANI depending on the asset.
Disclaimer: This guide is intended for general educational purposes. SFM compile steps may vary depending on the model, export tools, Source Filmmaker setup, and software versions. Always keep backups of your original project files before changing or compiling assets.