
 11
11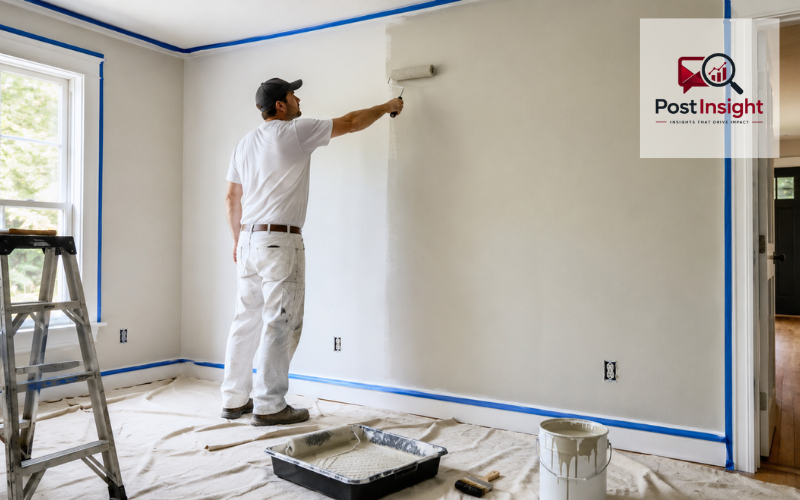
Learning how to paint a room is much easier when you follow the right order. Many beginners make the job harder by opening the paint can too early, skipping wall preparation, or rushing the second coat. A clean, smooth paint finish usually comes from simple steps done carefully, not from special skills.
This guide explains how to paint a room from start to finish in plain English. You will learn how to plan the job, choose basic tools, prepare the room, repair the walls, cut in around edges, roll the paint evenly, apply a second coat, and clean up without creating extra mess.
Whether you are painting for the first time, refreshing an old wall color, or trying to make your room look more professional, the process is the same: prepare well, work patiently, and paint in sections. When each step is done properly, even a beginner can get a neat result that feels fresh, clean, and well finished.
| Step | What to Do | Why It Matters |
| 1. Plan the room | Decide if you are painting walls, ceiling, trim, or doors | Helps you choose the right paint, tools, and time |
| 2. Gather supplies | Get paint, primer, roller, brush, tape, drop cloths, spackle, and sandpaper | Saves time and avoids stopping mid-project |
| 3. Prepare the space | Move furniture, cover floors, remove outlet covers, and tape edges | Keeps the room clean and protects surfaces |
| 4. Repair walls | Patch holes, sand rough spots, and clean dust or grease | Helps the paint look smooth and even |
| 5. Cut in edges | Use an angled brush around corners, trim, and ceiling lines | Creates clean borders before rolling |
| 6. Roll the walls | Use a roller in small sections with overlapping strokes | Gives even coverage across large wall areas |
| 7. Apply second coat | Let the first coat dry, then repeat the process | Improves color, coverage, and finish |
| 8. Clean up | Remove tape carefully, reinstall covers, and clean tools | Leaves the room neat and finished |
Before you start painting, take a few minutes to decide exactly what you want to paint. Some people only paint the walls, while others also paint the ceiling, trim, doors, or baseboards. This choice matters because each surface may need a different paint finish, brush, roller, or level of preparation.
Look at the condition of the walls first. If the walls have holes, cracks, grease marks, peeling paint, or rough patches, they will need extra work before painting. Also notice the current wall color. Covering a dark color with a light color, or changing from a bold shade to a soft neutral, may require primer or extra coats.
Lighting is also important. A color can look different in natural daylight than it does under warm indoor lights. If possible, test a small paint sample on the wall and check it at different times of day. Planning ahead helps you avoid wasted paint, uneven color, and extra cleanup later.
You do not need a large collection of expensive tools to paint a room well, but you do need the right basic supplies. The main items include paint, primer if needed, a paint tray, a roller, an angled brush, painter’s tape, drop cloths, spackle, sandpaper, a putty knife, cleaning cloths, and a damp sponge.
For most smooth interior walls, a 9-inch roller is a good choice. A 3/8-inch nap roller is commonly used for smooth or lightly textured walls, while thicker naps are better for rougher surfaces. A 2 to 2.5-inch angled brush helps you paint clean lines around corners, trim, windows, doors, and ceiling edges.
Quality tools can make the job easier. Cheap brushes may leave loose bristles in the paint, and weak painter’s tape may bleed or peel. Optional tools such as an extension pole, paint edger, plastic sheeting, or small detail brush can also help, especially if the room has high walls or tight spaces.
The cost to paint a room depends on the room size, paint quality, number of coats, wall condition, and whether you already own the tools. A small room usually needs less paint and fewer supplies, while a larger room, damaged walls, or a big color change can increase the total cost.
To estimate paint quantity, measure the height and width of each wall, multiply them to get the wall area, and subtract large doors or windows if needed. Many interior paints cover around 350 to 400 square feet per gallon, but coverage can vary, so always check the paint label. If you are applying two coats, plan for twice the coverage.
Time also depends on preparation. A simple bedroom may take one day if the walls are in good condition, but rooms with repairs, dark colors, or detailed trim can take longer. Prep, taping, cutting in, rolling, drying, second coat, and cleanup all need time if you want the finish to look smooth.
Good preparation is one of the most important parts of painting a room. Start by moving small furniture, lamps, wall decor, and rugs out of the room. If large furniture cannot be removed, move it to the center and cover it well. This gives you enough space to work safely around the walls.
Cover the floor with canvas drop cloths if possible. Canvas stays in place better than thin plastic and helps catch drips. Plastic sheeting can still be useful for covering furniture, but it can become slippery on the floor, so use it carefully.
Remove switch plates, outlet covers, curtain rods, nails, hooks, and wall hardware before painting. This gives you a cleaner finish and saves time compared with painting around everything. Apply painter’s tape along baseboards, trim, windows, door frames, and ceiling edges where needed. Press the tape down gently but firmly so paint does not seep underneath.
Paint sticks best to a clean, smooth surface. Before you paint, wipe the walls with a damp sponge or cloth to remove dust, fingerprints, grease, and cobwebs. Kitchens, bathrooms, and children’s rooms may need extra cleaning because walls in these spaces often collect more residue.
Next, repair holes, cracks, dents, or rough spots. Use spackle or wall filler for small holes and a putty knife to smooth it flat. Let it dry fully before sanding. If you paint over raised filler or rough patches, the flaws may become more visible after the paint dries.
Light sanding helps smooth repaired spots and can also help dull shiny areas on old paint. After sanding, wipe away all dust with a clean cloth. Primer is helpful when the wall has stains, patched areas, new drywall, strong color changes, or uneven surfaces. It creates a better base and can help the final color look more even.
If you are painting a room for the first time, the best advice is to slow down and work in order. Do not try to paint the whole room at once. Start with one wall or one section so you can stay in control and keep your tools organized.
The basic order is simple: prepare the room, clean and repair the walls, apply tape, prime if needed, cut in around edges, roll the walls, let the paint dry, apply a second coat, remove tape, and clean up. Following this order helps prevent common mistakes.
Beginners often overload the brush or roller with too much paint. This can cause drips, heavy lines, and uneven coverage. Another common mistake is pressing too hard on the roller, which can leave marks. Use steady pressure and let the tool do the work. Painting is not about speed; it is about even coverage and careful movement.
Cutting in means painting the areas that a roller cannot reach cleanly. These areas include ceiling lines, inside corners, baseboards, door frames, window trim, and tight spaces around outlets. This step gives the room clean edges and helps the rolled paint blend better.
Use a 2 to 2.5-inch angled brush for better control. Dip the brush about one-third of the way into the paint, then tap off the extra paint against the side of the container. Avoid wiping off too much paint, because a dry brush can leave rough lines.
Paint a border about 2 to 3 inches wide around the edges of the wall. Try to keep a wet edge, which means you roll the nearby wall area before the brushed paint fully dries. This helps prevent a darker outline around the room and gives the wall a more even finish.
A roller makes it easier to cover large wall areas quickly and evenly. Pour paint into a tray, then roll the roller through the paint and across the tray’s ridges until it is evenly loaded. The roller should be covered with paint but not dripping.
Start near the top of the wall and work in small sections, around 3 feet by 3 feet at a time. Roll the paint in a W or N shape to spread it across the area, then fill in the open spaces with overlapping strokes. This method helps distribute the paint without leaving heavy patches.
After the section is covered, use light vertical strokes from top to bottom to smooth the finish. Move to the next section while the edge is still wet. Working this way helps the sections blend together and reduces roller marks, streaks, and lap lines.
You can get a professional-looking result at home by focusing on a few simple habits. First, keep a wet edge as you work. This means each new section should slightly overlap the previous section before it dries. It helps the color look smooth across the wall.
Second, work from top to bottom. Start near the ceiling and move downward so you can catch drips as you go. Paint one wall at a time instead of jumping around the room. This keeps the finish more even and helps you stay organized.
Do not press too hard on the roller. Heavy pressure can create lines at the edges of the roller and make the paint look uneven. Use good lighting while painting so you can spot missed areas, streaks, or drips before they dry. A small work light can be very helpful in rooms with poor natural light.
Painting a room with two colors can add depth and style, but it needs careful planning. Two-color rooms often include an accent wall, a half-painted wall, color blocking, or different colors for walls and trim. Choose colors that work well together and match the mood of the room.
When possible, paint the lighter color first. It is usually easier to cover a light color with a darker one than the other way around. Let the first color dry fully before applying tape for the second color. If the paint is still soft, tape may pull it away or leave marks.
For sharp lines, press painter’s tape firmly along the edge and paint carefully near the tape. Remove the tape at the right time based on the paint and tape instructions. Pull slowly at an angle to avoid peeling. Patience is especially important when two colors meet on the same wall.
Although rollers are the easiest choice for most walls, you can paint a room without a roller in some situations. This may make sense for a very small room, touch-ups, tight corners, textured details, or areas where a roller cannot move easily. You can use a quality brush, paint pad, or sprayer depending on the surface and the finish you want.
Painting large walls with only a brush takes more time and care. To reduce brush marks, use smooth strokes in the same direction and avoid putting on thick paint. Thin, even coats usually look better than one heavy coat.
Paint pads can cover flat areas faster than brushes, but they may not work well on rough surfaces. A sprayer can be quick, but it requires more masking and careful ventilation. For most beginners, a roller is still the easiest option, but painting without one is possible with patience.
Painting a room in one day is possible when the walls are in good condition, the color change is not too dramatic, and you prepare well. The best way to save time is to do some preparation before painting day. Move furniture, remove outlet covers, patch holes, and clean the walls early if you can.
On painting day, keep all tools ready before opening the paint. Start with cutting in, then roll the first coat. Follow the drying time on the paint label before applying a second coat. Fast-drying paints may help, but you should not rush if the surface still feels tacky.
A one-day paint job is realistic for a simple room with minor repairs. It may not be realistic if the room has damaged walls, dark old paint, detailed trim, high ceilings, or humidity that slows drying. A slower job is better than a rushed finish that needs fixing later.
Most rooms look better with two coats of paint. The second coat improves color depth, hides thin spots, and creates a more even finish. Wait for the first coat to dry according to the paint label. Drying time can change based on paint type, room temperature, humidity, and airflow.
Apply the second coat using the same method as the first: cut in around edges, then roll the walls in sections. Keep your strokes even and avoid overworking paint that has already started to dry. If you keep rolling the same spot for too long, the finish can become patchy.
Remove painter’s tape carefully when appropriate. Some tapes are designed to be removed while paint is slightly damp, while others can stay longer, so check the tape instructions. Pull the tape slowly at a 45-degree angle. After the paint has dried properly, reinstall outlet covers, return furniture, and clean your brushes and rollers.
Knowing how to paint a room is mostly about preparation, patience, and the right order of steps. When you plan the room, protect the space, clean and repair the walls, use the right tools, and apply paint carefully, the whole job becomes much easier.
A smooth finish does not come from rushing. It comes from keeping a wet edge, using even pressure, allowing proper drying time, and applying a second coat when needed. These small details help prevent streaks, drips, lap marks, and uneven color.
Even if you are painting for the first time, you can still get a clean and professional-looking result at home. Follow the process step by step, give each stage enough time, and focus on doing the simple things well. With the right plan, painting a room can be a satisfying project that makes your space feel fresh, bright, and renewed.
Start by preparing the room, cleaning and repairing the walls, taping edges, cutting in with a brush, rolling the walls evenly, and applying a second coat after the first coat dries.
Most rooms need one to two gallons of paint, depending on wall size, paint coverage, number of coats, wall texture, and whether you are changing from a dark color to a lighter one.
Primer is helpful when walls are stained, patched, newly repaired, very dark, glossy, or uneven. It helps paint stick better and makes the final color look smoother and more consistent.
Yes, you can paint a simple room in one day if the walls are already clean, repairs are minor, and the paint dries quickly enough for a second coat.
Use the right roller nap, avoid pressing too hard, keep a wet edge, work in small sections, and finish each area with light overlapping strokes from top to bottom.
Disclaimer: This article is for general home improvement guidance only. Always read and follow the instructions on your paint, primer, tools, and safety labels. For lead paint, mold, major wall damage, electrical issues, or unsafe surfaces, contact a qualified professional before starting.