
 11
11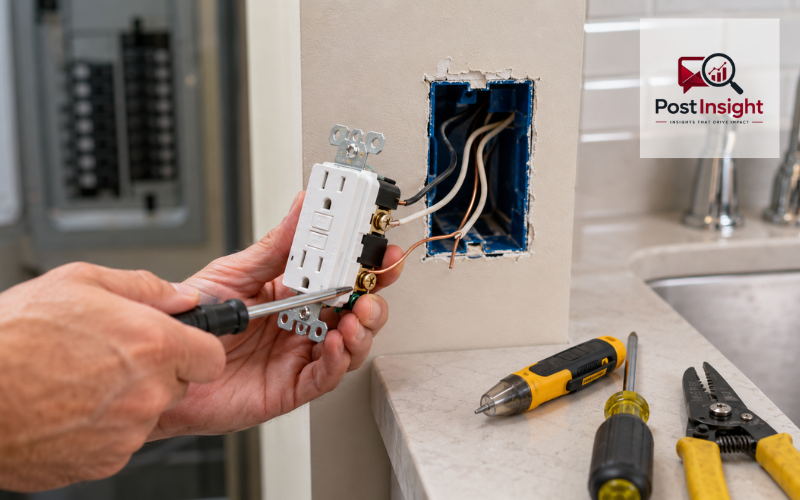
Installing ground fault circuit interrupter outlets is one of the most common electrical upgrades homeowners think about when they want better safety near water, damp areas, or older standard outlets. A ground fault circuit interrupter outlet, usually called a GFCI outlet, is the outlet with the small TEST and RESET buttons on the front. Its job is simple but very important: it watches the flow of electricity and shuts off power quickly when it senses that electricity may be leaking somewhere it should not go.
This matters because electricity can become dangerous when it finds a path through water, a wet surface, a damaged cord, or even a person. A normal outlet only provides power. A GFCI outlet adds a layer of protection against electric shock.
Before installing ground fault circuit interrupter outlets, it helps to understand a few basic wire terms. The hot wire carries power to the outlet. The neutral wire carries power back. The ground wire gives electricity a safer path during a fault. On a GFCI outlet, LINE means the incoming power from the breaker panel, while LOAD is used only when you want that same GFCI to protect other outlets farther down the circuit.
Even if the job looks simple, electrical work should never be rushed. The power must be turned off, the wires must be tested, and the outlet must be wired correctly. If the wiring looks confusing, damaged, old, or different from what you expected, it is safer to stop and call a licensed electrician.
| Topic | Quick Explanation |
| Best Use | Bathrooms, kitchens, garages, laundry rooms, basements, and outdoor outlets |
| Main Safety Step | Always turn off the breaker and test for power before touching wires |
| LINE Wires | Incoming power wires from the breaker panel |
| LOAD Wires | Outgoing wires that protect other outlets downstream |
| Basic Wire Colors | Black is usually hot, white is neutral, bare copper or green is ground |
| Common Mistake | Reversing LINE and LOAD connections |
| Final Check | Press TEST and RESET, then use a GFCI outlet tester if available |
| Call an Electrician When | Wires are damaged, confusing, ungrounded, aluminum, or the breaker keeps tripping |
GFCI outlets are important because they help reduce the risk of serious shock. They are especially useful in places where water and electricity may be close together, such as bathrooms, kitchens, laundry rooms, garages, basements, and outdoor areas. These are the areas where a person may touch an appliance, tool, or outlet while standing near moisture.
A GFCI outlet does not make electricity harmless, but it can shut off power very quickly when it senses an unsafe change in the current. That quick shutoff is what makes it different from a regular outlet. A standard outlet may keep supplying power even when something is wrong. A GFCI outlet is designed to react when the electrical path becomes unsafe.
Older homes may still have standard outlets in areas where GFCI protection is now commonly required or strongly recommended. Replacing a regular outlet with a GFCI outlet can be a smart safety upgrade, especially near sinks, garage workbenches, unfinished basements, and outdoor receptacles.
It is also important to understand that GFCI protection and normal power delivery are not the same thing. A regular outlet gives you power. A GFCI outlet gives you power while also watching for certain shock hazards. That is why installing ground fault circuit interrupter outlets is not just about convenience. It is about making everyday electrical use safer.
The first step before any outlet work is turning off the correct breaker. Do not rely only on the wall switch, because a switch may not remove power from the outlet box. Go to the electrical panel, find the breaker that controls the outlet, and turn it off. If the panel is not clearly labeled, you may need another person to help identify the correct circuit.
After the breaker is off, test the outlet before touching any wires. A non-contact voltage tester is helpful because it can warn you if power is still present. Hold it near the outlet slots and near the wires after the cover plate is removed. If the tester shows voltage, stop immediately and check the breaker again.
This step is not optional. Many electrical accidents happen because someone assumes the power is off without testing. When installing ground fault circuit interrupter outlets, testing before touching is one of the safest habits you can follow.
DIY installation may not be safe in every situation. If you find aluminum wiring, burned insulation, loose wires, no visible ground, a crowded electrical box, mixed wire colors, or more wires than expected, it is better to call an electrician. The same is true if the outlet is part of a multi-wire circuit or if the breaker keeps tripping after installation.
For a basic GFCI replacement, you need a new GFCI outlet with the correct amp rating, usually 15 amp or 20 amp. The outlet rating should match the circuit and the wire size. Many homes use 15-amp outlets on general circuits, while some kitchen, bathroom, laundry, or garage circuits may be 20 amp. If you are unsure, check the breaker and the existing wiring, or ask an electrician.
You will also need a non-contact voltage tester to check for power and an outlet tester with a GFCI test button to confirm the outlet works after installation. Basic hand tools include a flat-head screwdriver, Phillips screwdriver, wire strippers, and needle-nose pliers. Electrical tape, approved wire connectors, and the correct wall plate may also be needed.
Before starting, read the instructions that come with the GFCI outlet. Different brands may have slightly different terminal designs, but the basic idea is the same. The LINE terminals are for incoming power, and the LOAD terminals are only for protecting additional outlets downstream.
Using the right tools helps the job go smoothly, but tools do not replace safe judgment. If anything feels unclear, stop before making connections.
LINE and LOAD are two of the most important terms to understand before wiring a GFCI outlet. LINE is the power coming into the outlet box from the breaker panel. This is the connection every GFCI outlet needs in order to work. The LINE hot wire connects to the brass or gold LINE terminal, and the LINE neutral wire connects to the silver LINE terminal.
LOAD is different. The LOAD terminals send protected power to other outlets farther down the same circuit. If you connect downstream outlets to LOAD, those outlets can also receive GFCI protection from the first GFCI outlet.
Mixing up LINE and LOAD is one of the most common mistakes when installing ground fault circuit interrupter outlets. If the wires are reversed, the GFCI may not reset, may not provide proper protection, or may make other outlets stop working.
If there is only one cable in the box, you usually use only the LINE terminals. If there are two cables, one cable may bring power in, and the other may carry power out to other outlets. In that case, you must identify which cable is LINE and which is LOAD before connecting anything. Never guess.
When people ask how to install a GFCI outlet with 2 wires, they may mean a simple outlet box with one hot wire and one neutral wire. In many modern cables, there may also be a bare copper or green ground wire. This is usually the simplest type of single-location GFCI installation because there are no downstream outlets to protect from this device.
After turning off and testing the power, remove the old outlet and look at the wires. The hot wire is usually black, and the neutral wire is usually white. The ground wire, if present, is bare copper or green. The hot wire connects to the brass LINE terminal, and the neutral wire connects to the silver LINE terminal. The ground wire connects to the green ground screw.
In this type of installation, the LOAD terminals usually stay covered with the factory tape. Do not remove the tape unless you are connecting downstream wires. Using LOAD when it is not needed can create confusion and may cause the outlet not to work as expected.
After the outlet is secured in the box, turn the breaker back on and press RESET. Then press TEST to make sure the outlet trips, and press RESET again to restore power.
The phrase how to wire a GFCI outlet with 3 wires can mean different things, so it must be handled carefully. Many homeowners use “3 wires” to mean hot, neutral, and ground. In that case, the installation is similar to a simple single-location GFCI connection. The hot wire goes to the brass LINE terminal, the neutral wire goes to the silver LINE terminal, and the ground wire goes to the green screw.
However, if the box has three insulated wires, such as black, white, and red, the wiring may be more complicated. A red wire may be used for a switched outlet, a split receptacle, or part of a multi-wire branch circuit. In that situation, it is not wise to guess. A GFCI outlet must be connected in a way that matches the circuit design.
Older boxes may also have wiring that does not follow the color patterns you expect. Paint, age, repairs, or past DIY work can make wire identification harder. If the wiring does not clearly match a basic hot-neutral-ground setup, the safest choice is to stop and have it checked by a licensed electrician.
The main mistake to avoid is assuming every “3-wire” setup is the same. It is not. Correct wiring depends on what each wire actually does, not just its color.
Learning how to install a GFCI outlet with 4 wires is important because four wires often mean the outlet is in the middle of a circuit. One pair brings power in from the breaker, and the other pair sends power out to another outlet. There may also be ground wires in the box.
In this setup, you need to separate the incoming LINE pair from the outgoing LOAD pair. The LINE pair must be connected to the LINE terminals on the GFCI. If you want to protect the downstream outlet, the outgoing pair connects to the LOAD terminals. If you do not want downstream protection, the wiring must be handled differently using proper splicing methods, which may be better left to an electrician.
Finding the correct LINE pair is the key step. With wires safely separated and not touching, the power is briefly turned back on only for testing, and a voltage tester is used to identify the incoming hot wire. Then the power must be turned off again before any wiring work continues.
This part can be risky for someone without electrical experience. If you are unsure which wires are LINE and which are LOAD, do not continue by trial and error. Incorrect wiring can leave outlets unprotected or cause the GFCI not to reset.
Many homeowners say “wiring a GFCI outlet in series” when they mean using one GFCI outlet to protect other outlets after it on the same circuit. In everyday language, this usually refers to downstream protection. The first GFCI outlet receives power on its LINE terminals and then sends protected power out through its LOAD terminals.
This can be useful in a bathroom, garage, kitchen, basement, or outdoor circuit where several outlets need protection. Instead of installing a GFCI device at every location, one properly placed GFCI outlet can protect standard outlets farther down the line.
When downstream protection is used, the protected outlets should be labeled. Many GFCI outlets come with stickers that say “GFCI Protected Outlet.” If there is no equipment ground, the correct “No Equipment Ground” label may also be required. Labeling helps future homeowners, inspectors, and electricians understand how the circuit is protected.
Incorrect LOAD wiring can shut off other outlets or make troubleshooting difficult. If several outlets stop working after a GFCI trips, the first GFCI in the circuit may need to be reset. This is normal when downstream protection is used, but it can be confusing if the outlets are not labeled.
Bathrooms commonly need GFCI protection because water, wet hands, sinks, grooming tools, and electrical outlets are often close together. A bathroom outlet may power hair dryers, electric razors, toothbrush chargers, or other small appliances. These everyday uses make shock protection very important.
Installing a GFCI outlet in a bathroom follows the same basic safety steps: turn off the breaker, test for power, remove the old outlet, identify the wires, connect LINE correctly, secure the outlet, and test it after installation. The key is making sure the bathroom outlet is properly protected and that the wiring is in good condition.
Outlet placement also matters. Bathroom outlets should be convenient but not placed where they can easily be splashed or contacted from a tub or shower area. Local code rules may include specific placement and circuit requirements, so it is smart to check local requirements before making changes.
If the bathroom has older wiring, no ground, flickering lights, tripping breakers, or signs of moisture inside the box, call an electrician. Bathroom electrical work should be treated with extra care because the risk level is higher than in dry living spaces.
Replacing a regular outlet with a GFCI outlet in a standard outlet box is common, but the box must have enough space. GFCI outlets are usually deeper than standard receptacles, so a small or crowded box can make installation difficult. Cramming wires behind the device can loosen connections or damage insulation.
Before installing ground fault circuit interrupter outlets in a standard box, look at the condition of the box and wires. The box should be firmly mounted, the wires should be long enough to work with safely, and the insulation should not be cracked or burned. If the box is metal, grounding must be handled correctly.
Matching the outlet rating to the circuit rating is also important. A 20-amp GFCI outlet has a different slot shape than a 15-amp outlet. Do not install a 20-amp receptacle on a 15-amp circuit. If you are not sure which device is correct, check the breaker size and wiring or ask a professional.
When folding the wires back into the box, take your time. The wires should bend neatly without forcing the outlet into place. A clean, secure fit helps prevent future loose connections.
A GFCI outlet wiring diagram can be very helpful before installation, especially for understanding LINE-only wiring and LINE-and-LOAD wiring. A simple LINE-only diagram shows the hot wire connected to the brass LINE terminal, the neutral wire connected to the silver LINE terminal, and the ground connected to the green screw.
A LINE-and-LOAD diagram shows two sets of wires. The incoming hot and neutral wires connect to LINE. The outgoing hot and neutral wires connect to LOAD if downstream outlets need GFCI protection. This type of diagram helps explain why the LOAD terminals are covered with tape on a new GFCI outlet. They are not meant to be used unless you need them.
A good diagram should clearly show the ground connection point. The ground wire does not connect to the hot or neutral terminals. It connects only to the green ground screw and, when required, to the metal box or grounding system.
Diagrams are useful, but they should not be followed blindly. Your actual wiring may be different from the drawing. If the wires in your wall do not match the diagram, it is better to stop and ask for help than to force the wiring to fit the picture.
One of the biggest mistakes is reversing LINE and LOAD wires. A GFCI outlet depends on the correct connection to work as designed. If the incoming power is placed on LOAD instead of LINE, the outlet may not reset or may fail to protect properly.
Loose terminal connections are another common problem. Wires should be secured firmly under the correct terminal clamp or screw. Loose wires can cause heat, arcing, flickering, or outlet failure. The wire should not be damaged, nicked, or barely held in place.
Using the wrong amp-rated outlet is also a mistake. The outlet, breaker, and wire size must work together safely. A wrong device can create code and safety problems.
Some people forget to test the GFCI after installation. Pressing RESET and seeing power is not enough. Press the TEST button to confirm the device trips, then press RESET again. An outlet tester with a GFCI test button can also help confirm correct operation.
Another mistake is trying to install a GFCI outlet without understanding the grounding situation. A GFCI can provide shock protection even in some older ungrounded systems, but labeling and code rules matter. If there is no ground wire or the grounding system is unclear, get professional help.
Installing ground fault circuit interrupter outlets can make a home safer when the work is done correctly. The basic process is easy to understand: turn off the breaker, test for power, identify the wires, connect LINE correctly, use LOAD only when needed, secure the outlet, and test the device before regular use.
The most important part is not speed. It is safety. GFCI outlets are designed to reduce shock risk, especially near moisture, but they must be installed and tested properly. A wrongly wired GFCI can create confusion and may not provide the protection you expect.
If the outlet box has simple wiring and you feel confident, replacing a standard outlet with a GFCI may be a manageable project. But if you see four wires, unclear colors, no ground, damaged insulation, aluminum wiring, a tight box, or repeated tripping, stop and call a licensed electrician.
A safe electrical upgrade should leave you with more confidence, not more questions. When installed correctly, a GFCI outlet adds valuable protection to bathrooms, kitchens, garages, basements, outdoor spaces, and other areas where electrical safety matters most.
A GFCI outlet monitors electricity flow and quickly shuts off power if it detects leakage. This helps lower the risk of electric shock, especially near water or damp areas.
You can install a GFCI outlet yourself if the wiring is simple and you understand basic safety steps. If wires look confusing, damaged, or ungrounded, call a licensed electrician.
LINE connects the incoming power from the breaker. LOAD sends protected power to other outlets farther down the circuit. Mixing them up can stop the GFCI from working correctly.
Yes, bathrooms commonly need GFCI protection because water and electricity are close together. A GFCI outlet helps reduce shock risk when using appliances near sinks or moisture.
A GFCI may not reset if LINE and LOAD wires are reversed, power is not reaching the outlet, a connection is loose, or there is a ground fault on the circuit.
Disclaimer: This article is for general educational purposes only and should not replace advice from a licensed electrician. Electrical work can be dangerous if done incorrectly. Always follow local electrical codes, turn off power before working, test wires carefully, and contact a qualified professional if you are unsure about any step.


